Rails and Trails Imaging
HomeAbout UsPhyllis' GalleryKeith's GalleryBooksModel RRContact Us

Model RR - Animation and Special Effects
Localized Sound Effects
My vision is to utilize a servo motor and sound card to animate a locomotive taking on water.  This project is not started.
Thunderstorm Ignites a Forest Fire
This attraction is more elaborate to create.  It will utilize front video projection, strobes, sound, lots of LED's, smoke and even a fire fighting train.
Operating Spar Tree
To animate the logging camp scene, I'm designing a spar tree that lifts and lowers logs and also rotates.  This will require servo, stepping motor, and sound card.
City Lights and Animated Signs
My idea of a city filled with life is animated signs and building lights that are constantly changing.  This will utilize Miller Signs, Arduino controlled LED's, and sound cards.
Having some animation and special effects on a layout adds great visitor interest as well as providing challenges to the skills and imagination of the builder.  As usual, it all starts with day and night time lighting, but then my imagination took over.  As I learned more about servos, Arduino, and other sensor and control circuits, I wanted to do more.  Here are some of my ideas.
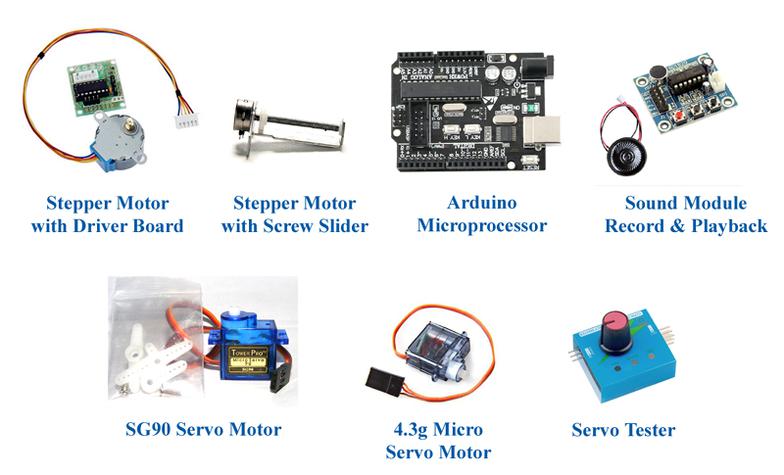
These basic tools can be used to create many types of movement, sound and special effects.
Smoke Generator Using Vape Heating Units
On any model railroad, adding localized sound effects can add to the realism by stimulating another one of our senses.   I will use babbling brooks, waterfalls, cows, surf and sea gulls just to mention a few.  Since these are associated with very specific scenes on the layout, the sound needs only be present when a viewer is in the proximity.  So, I combined available technology with a trigger circuit to make it happen.  The sound modules are available from Ngineering.com, the PIR motion sensors are available on Ebay, and I will show you how to built the trigger circuit and connect the components.
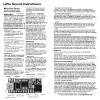
Little Sound Instruction Sheet by Ngineering.  These units provide enough volume for a home layout.  If you need more volume, they also sell a larger module.
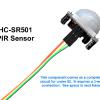
HC-SR501 Passive Infrared motion sensor.  This contains all the circuitry to analyze and detect.  The trigger output is ready to use in an application without Arduino.
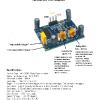
Specifications and adjustments for the PIR motion sensor.
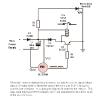
Schematic of trigger circuit. It simply takes the output from the motion sensor, which is about +3.5V, and uses a transistor to control a relay.  The relay terminals are connected to the control pads of the sound module.
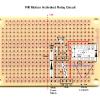
This is the design layout for the PCB that I created.  The power supply is 9Vdc for all components.  So, I connected the input pads of the sound module to this board.  This circuit provides polarity protection for all the components.
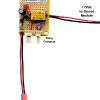
Completed circuit board using the previous layout.  I do this kind of documentation for everything I build, so it is much easier to troubleshoot later.  I also used pin terminals for both the relay contacts and the PIR motion sensor.
To play slide show, click on the 1st picture.
I have never been happy with the Sleuth Smoke Units -too expensive, need lots of refilling, and generates excessive heat.   I got this idea of generating smoke using an ECigarette with glycerin as fuel.  This produces lower heat, uses inexpensive fuel, and produces enough smoke to support many chimneys, produce a house on fire, a forest fire, etc.   A 3.7Vdc supply voltage is required for the heating coils, which I show you how to build.  All components are available at a reasonable price.
Working Water Tanks
To play slide show, click on the 1st picture.
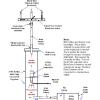
This schematic shows how all the components are used to make a working smoke generator with an air flow valve for 3 outputs to different destinations -like chimneys.
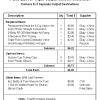
Parts list and supply source for all components shown in the schematic.
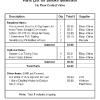
Since the air flow control valve is optional, this parts list shows the cost of building a unit with a single output.  This is sufficient for use as smoke for a house fire or forest fire.
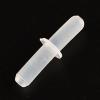
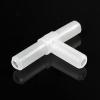
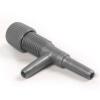
All of the air flow components are standard 4 mm ID aquarium fittings.  I use this straight connector for the fittings in the smoke chamber and the air tank where tubing needs to be connected.
Tubing can be purchased in any length.  Watch the price.  You can pay way too much.
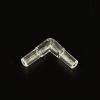
I use these where the tubing turns up into a chimney or building.  This avoids a kink from a sharp bend in the tubing .
Only needed if you split the output without using a flow control valve.
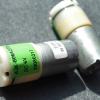
These air pump motors operate on 6Vdc and produce air flow of 2 liters per minute.  The output nipple needs to be 4 mm.  Some units have smaller connectors.
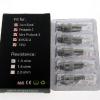
The Vape heater units are sold as replacement coils and can be purchased in packages of 5.  They operate on 3.7 Vdc.  You can go a little lower but not higher.
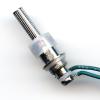
Heater unit showing the wires soldered where contact with the battery is normally made. This is a delicate operation as these are small.  Clean the surface with alcohol to remove any oily film and tin the wire and the surface.
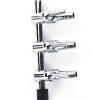
Triple control valve to control flow and split output to multiple destinations. This is totally optional.  They are also available for 2 to 6 valve units.
This is a single air control valve which can be cascaded for multiple outputs.
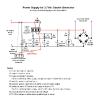
This is a circuit diagram of a variable power supply.  For this project, a 6 Vdc is needed for the air pump and a 3.7 Vdc supply is needed for the heater coil.  Only a couple of parts need to be changed to make either.  The max. output of the LM317 is 1.5 Amps.
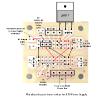
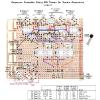
This illustration shows the layout of the components using a Radio Shack 276-159 Printed Circuit Board.
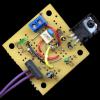
Finished 3.7 Vdc power supply.  Blue screw terminals are for the output connections and the purple wires go to a 12 to 16 V buss line.  A fixed resistor has been substituted for the trim pot.
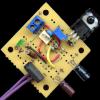
Finished 6.0 Vdc power supply.  Blue screw terminals are for the output connections and the purple wires go to a 12 to 16 V buss line.
I built this sequence timer to turn off the smoke generators every 30 seconds or so.  The interval can be adjusted from 20sec to 45sec.  The air pump runs longer to clear the lines.  After a 30sec delay, the cycle repeats.
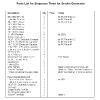
This is the parts list for the sequence timer.  I will not explain the circuit.  Go online and study a 555 timer tutorial on how the timers work and how to reset them.  This is strictly optional.  I thought less smoke was just as effective.